Silhouette and Cricut Inspired Projects
Silhouette and Cricut Inspired Projects. As promised I am back to share some inspirational projects created using the Silhouette and Cricut Electronic Cutters. There is so much you can do with them and one of our latest discoveries is that you can cut metal sheets with them. The fun part is that is only a small portion of what you can do. There is so much and so today we will begin by sharing some basic projects that will make you shine. Enjoy!
 Beginner’s Project
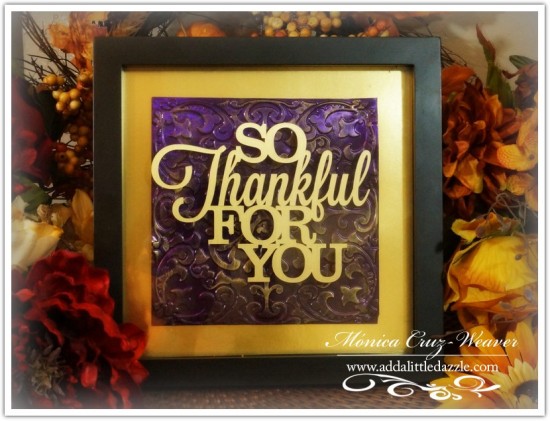
I am so excited to share today’s project with you. I created this beautiful yet simple picture frame using my Silhouette Cameo. I have to tell you I am in love with my machine as it is so easy to use. If there is any project I recommend for a beginner, it’s in using Vinyl. Vinyl is very easy to cut with your Silhouette and creates an amazing look.
To begin the process, I purchased this digital file from the Silhouette Design Store for 99 cents and placed it in my library. Then, I simply imported it onto my computer screen, set the correct settings for vinyl, and cut this baby out.
This shadowbox measures 8″ x 8″ and I purchased it at Hobby Lobby on sale for $5. I wanted a clean background and so I attached a piece of Golden Glimmer Craft Metal Sheet to a piece of card stock. Then, I took a piece of Polished Purple Craft Metal Sheet and embossed it with a stencil using the No More Shims and applied Inka Gold over the top of the metal to add texture.
This is a simple, inexpensive gift that is perfect for any occasion. Make sure to pick up shadowboxes during your Black Friday shopping, but before you head out the door you want to make sure to check out Add a Little Dazzle Black Friday Specials.
 I am BLESSED

There are no words to truly express what my design team means to me. The words on this frame are only a small portion of what these amazing women mean to me. When I think of each of them, my heart is filled with gratitude and my eyes with tears.
Not only are we all on the same design team, but we have all become friends. Behind the scenes we all have a private group where we share tips, products, and even our everyday lives. Whether it be about our aging parents, a sick child, rebellious children, sick spouse, or lack of mojo we are there for each other. I have been told over and over that few design teams have the closeness we do and I am thankful for that special gift we have.
During my surgery and recovery, I received cards in the mail, calls, emails, and even personal texts and calls to my husband to make sure I was ok. We didn’t talk business. My team just wanted to know that I was ok. I sat and cried of what a blessing these ladies are to me. Day after day they checked on me just to make sure I was ok.
Dazzling Divas, I love each of you. I thank you for all your hard work, dedication, and countless hours you spend helping me get the word out about Add a Little Dazzle. I love each of you more than any of you will ever know. Thank you Keren Baker, Kate Capper, Lydia Evans, Cathy Parlitsis, Martha Lucia Gomez, Lee-Anne Cross, Lee Ann Barrett, Vicki Dutcher, and my husband who make all this possible. Without each of you I couldn’t do this. I am Thankful for Each of You.
Want to See More Projects Using the Silhouette and Cricut?
 Hot Cocoa Gift
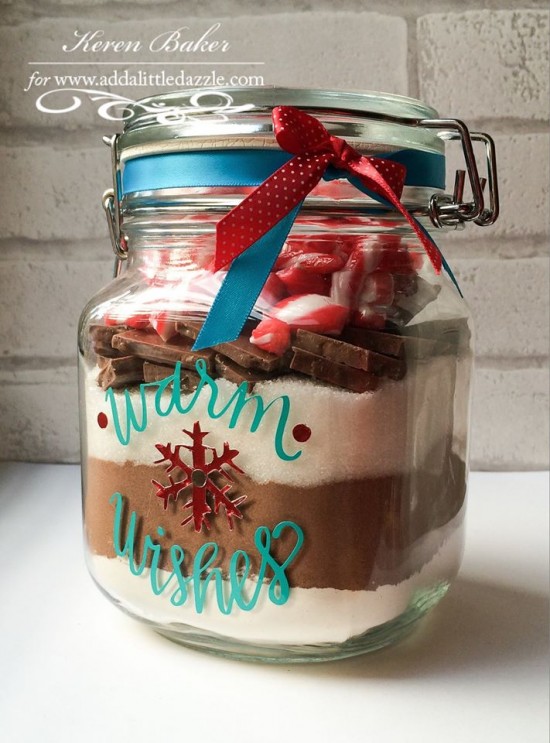
Check out this super fun Hot Cocoa Gift Jar Keren Baker created for the Add a Little Dazzle and Neat & Tangled Blog Hop Day #4. Keren used the Warm Wishes Digital Stamp Set from Neat & Tangled and cut out the images in both vinyl and Add a Little Dazzle Craft Metal Sheets.
The sentiment Warm Wishes was cut out of vinyl and adhered to the jar and the snowflake was cut out using Scarlet Red Craft Metal Sheets. All this was cut out with the Silhoutte Electronic Cutter. Isn’t that cool? Visit Keren Baker’s BLOG and get more details about how she created this amazing gift jar. Make sure to leave her a comment!
 Envelope With Flair
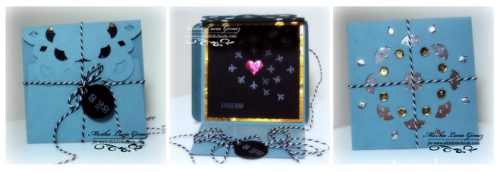
There is nothing like adding those finishing touches to those handmade gifts and cards. Today, Martha Lucia decided to showcase just how you could do that and created a fun and interesting Mini Envelope using the Cricut Explore during the Add a Little Dazzle and Neat & Tangled Blog Hop Day #4.
The fun thing about using the Cricut Explorer and the Silhouette Cameo is that it can easily cut small intricate pieces such as what you see in the picture above. There are some adjustments you have to make to the blade and settings, but it is amazing what you can do. Visit Martha Lucia’s BLOG and get more details about how she created this fun envelope. Make sure to leave her a comment!
Are You Ready to Try Craft Metal Sheets?
Shop Our Boutique Today!


Love you, Monica!
Such a beautiful card to treat someone for Thanksgiving! Terrific color combo too!
… I have happy tears . Thank you so much for asking me to be a part of this little crafty family .. huge hugs 😀
These projects are just wonderful. I LOVE my Silhouette and all the fun things that can be done with it. And it is great to see what other crafters are making- thanks!
Awwwww! That’s so sweet! I love the projects tonight.
You have a great team there. What a blessing!
Mwah! Right back at you, Monica! I feel so blessed to be part of this amazing group of women and it’s all because of you! Thank YOU for inviting me into this fabulous team!
It is my pleasure to be on your team! YOU make it the fabulous group that we are! 🙂